Showing posts with label Gelli plate. Show all posts

Wednesday, 22 February 2023

The100DayProject


Collage 1/100
The first day and for the next 99 days my daily collages can be found on Instagram @friedaquilter and occasionally here. I am continuing my project from last year but working on A5 cards, using circles as my theme and only using paper painted or printed by me


Sunset

Monday, 7 February 2022

StencilGirl February 2022 Project


February is a month with very low light levels and after getting through January I always dread going through another winter month. At least it’s shorter by some days! One way I use to cheer myself up is to use as much colour as possible whenever I can, and this project (or rather projects) grew out of that desire.

Here is the link to the tutorial:


Wednesday, 17 April 2019

Stencilgirl April 2019 Project

When the December 2018 Stencilgirl® Club stencils, called Fancy Houses, arrived, they made me feel quite nostalgic. They featured houses that could have stepped straight from the streets of Amsterdam, the city where I was once a student, now many moons ago. Of course I simply had to use them in one of my monthly projects for Stencilgirl® and this is the resulting 9 x 12" page I made.
 You can find a full step-by-step tutorial together with a list of the stencils I used on the Stencilgirl® Talk website.
If you fancy a trip April is a great time to visit The Netherlands as the bulb fields will be so colourful and within easy reach of the city.

Thursday, 14 March 2019

Stencilgirl March 2019 Project

Almost everything you can do on paper you can also do on fabric. For my Stencilgirl® project this month I wanted to experiment a bit more with layering paints on fabric.  I used small gelli plates as stamps and you can read all about this as well as see the paints and stencils I used on the Stencilgirl®Talk website today.  
I’m very happy with the resulting piece of cloth but haven’t decided yet what I’m going to do with it and I’m leaving it up to you to decide for yourself. You could make it into a wall hanging simply by framing, or you could layer it up with batting and a backing fabric, hand or machine quilt it and then make it into a hanging. Beading would also be a good option.  The resulting piece could become the cover for a notebook or an art journal. The main thing is to have fun and play to your heart's content.


Wednesday, 30 January 2019

Monday, 15 October 2018

The Stencilfied Journal Prompt 20

As you can tell below, our latest prompt for #thestencilfiedjournal told us to us office supplies to embellish our pages. I used little round tags as well as washi tape. All my spreads for #thestencilfiedjournal are done in a 9 x 14cm art journal.
I started by making the background, using acrylic paint with the large stencil from the September Stencilgirl®Club set and I added rubber stamping as well as collage with tissue wrap and vintage text. I stencilled on top of the previous layers using blue acrylic paint and  Stencilgirl® L471 Hamburg, designed by Nathalie Kalbach.
The little round tags were coloured on a gelli plate, rubber stamped and then stencilled with white paint using stencil L606 Soulful Scribbles Flourishes, also by Stencilgirl®. The pattern was outlined and then I added words to each tag. The tags were adhered to the background using the string they come with and washi tape.

Thursday, 4 January 2018

More 365somethings2018 backgrounds

In the spirit of #365somethings2018 I made more backgrounds on my 3.5" art cards. You can read more about this project if you click on the 365somethings2018 tag below this post and over the year you can find all my posts on this subject there. Pictures can also be found on my Instagram feed with the same hashtag.

I'm still only making backgrounds on the cards at the moment and will continue adding more and more layers till I decide one of the cards may be close to the finishing line and then I will start to show you finished cards and hopefully there will be 365 of those at the end of the year.
For today's session I was inspired by a class by Carolyn Dube for Creative Jumpstart 2018. It involves using a gelli plate and I used a 3" square one. No more instructions but still plenty of time to join Creative Jumpstart, organized by Nathalie Kalbach, yourself. I can't recommend it highly enough. It makes the usually dreary month of January go with a bang!

Tuesday, 2 January 2018

365Somethings2018

Time to announce the first project I'm going to attempt to do this year and it is a 365 one. It originates with Hanna and I was attracted to it as it's not about making one project each day but rather a question of working on something to do with your project every day to eventually arrive at finished items. I am keeping it small and am working on 3.5"  square Artist's Tile Cards, available in sets of 75. They have 300gsm paper so should stand up to whatever I'm going to throw at them. They are produced by Peter Pauper Press in US.

You can read more about this project, both on Hanna's blog as well as on that of Daisy Yellow . The aim is to end up with 365 finished cards by the end of this year. You will only get glimpses of the progress on my own cards here on this blog and on my Instagram feed with the hashtag #365somethings2018. When I have cards that I consider finished I will share them with you but I aim to do a little bit of something on these cards every day, even if it consists of just brayering on some paint. Wish me luck!
Here are ones on which I have made a start, using brayering, stencilling and a bit of collage. I also added washi tape on some. To start with though I will concentrate on making backgrounds for all the cards. I won't mention all the supplies I will be using but you can count on the fact that mostly the stencils I'm going to use are by Stencilgirl Products.

Wednesday, 29 November 2017

Touch to Texture

Today I'm treating you to an entire art journal that was done both for The Sketchbook Project as well as for Stencilgirl Products as my monthly project for them. That means you will get a full step-by-step tutorial for it! Link is coming up.

First of all this is my 9th sketchbook for The Sketchbook Project. You can see all the previous ones here. The idea is simple. You sign up, they send you a sketchbook, you fill it in whatever way you like (doesn't have to be sketching but can be anything), and return it to them. If you pay extra, your sketchbook will then be digitized and can be viewed online, while the actual sketchbook is added to the Brooklyn Art Library where it can be borrowed by anyone who visits. The sketchbooks also go on tour throughout the US and sometimes further afield.

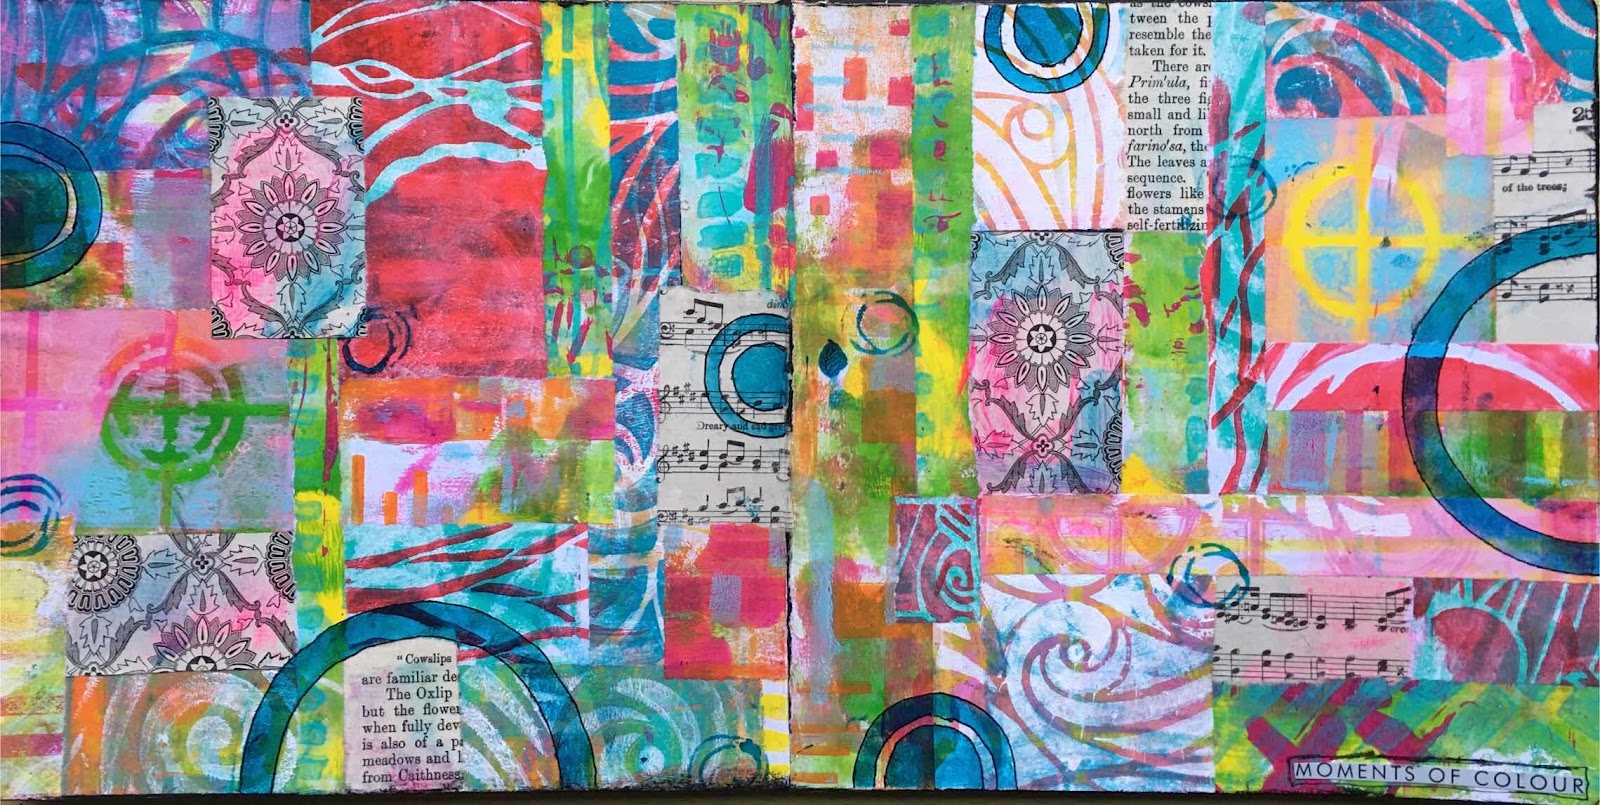
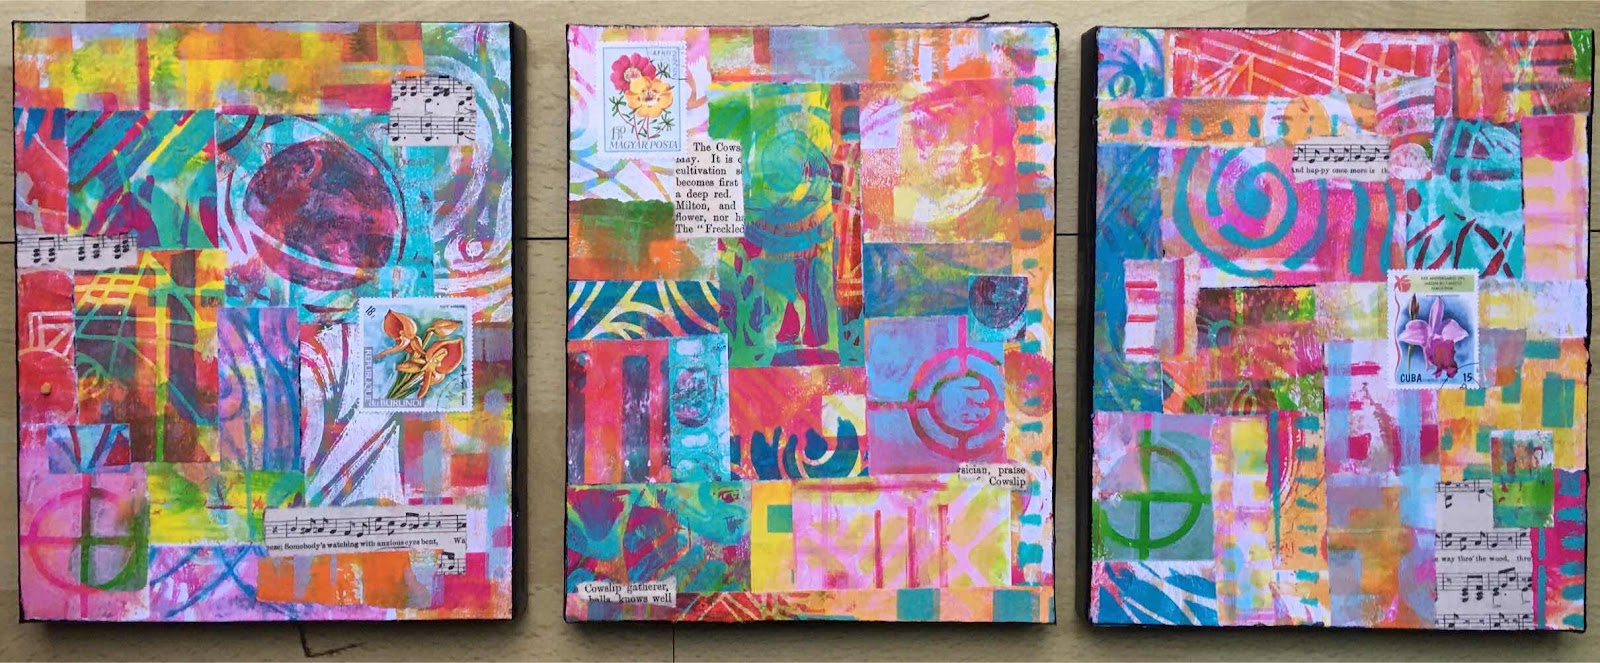
For this year's sketchbook I decided to remove the pages from the sketchbook and work on them separately and then bookbind them back into the journal.

All the instructions with step-by-step pictures can be found on Stencilgirl Talk today.

I used my gelli plate (8 x 10") and a set of 3 Stencilgirl stencils, all designed by Andrew Borloz: L568 Crazy Quilts Bold & Beautiful, L569 Crazy Quilts Calm & Frenzy, and L570 Crazy Quilts Crosses & Rounds. Do I need to tell you how much I love these stencils? I think not! Anything that combines my love of quilting and stencils is simply the best in my book.
I choose the theme Texture from the list provided by The Sketchbook Project this year (you can also choose your own, if you prefer) and that meant I wanted to add not just visual texture to the pages but also actual touchy feelly texture in the shape of stitching, specially as this resonated with the crazy quilt theme of the stencils. You can see it on the close-ups. I  must admit though that it doesn't compare to holding the sketchbook in your hands and stroking it. I expect I will do this quite a bit before I mail it off in the coming days to it's final destination in Brooklyn, NY.

You can see a flip through of this sketchbook here!

Yes, I have finally uploaded my own video to my YouTube channel after much deliberation and try-outs. Hope you'll pay a visit. 

I enjoyed making this sketchbook hugely. It reminded me how much I love to hand stitch and encouraged me to do lots (and lots, and then some more) on the quilt I'm working on at the moment. It's so addictive and very zen. If you find mindfulness hard going, give hand stitching a go!

I'm also very happy that Stencilgirl Products has given me the opportunity to share my process as well as the end result with you, in my capacity as Guest Designer. And I'm ecstatic to be able to announce I will be back with them once a month in 2018! 

Tuesday, 12 September 2017

The Greatest Bliss

You may remember that back in June I was one of the Guest Designers on the Artful Adventures, Stroll through the Hood project, initiated by Nathalie Kalbach to celebrate the publication of her book with the same name. There was a step-by-step tutorial from me for this project on her site but I wasn't able to share a picture of the entire page then. Enough time has passed to enable me to share it with you now.
For the Stroll we were given prompts and we could interpret them any way we wanted in photographs. I chose the Penicuik Estate for my "hood". The estate surrounds Penicuik House.  The house dates from the 1760s but sadly burned down in 1899 and only the walls were left standing. There was no money to restore the house and it remained in a ruined and dangerous state till 2007 when the Penicuik House Preservation Trust took on the huge project of stabilizing the house which is now finished. The Trust then started on a long term (till 2035) plan to restore the various built structures within the landscape of the estate.  One such structure is the Chinese Gates, as seen abovedating from 1758. These have now been fully restored as close as possible to the original structure. 

You come to the Gates from the Lime Walk extending from the side of the house and when you look into the far distance you see the Allan Ramsay Monument, erected in 1759 by Sir James Clerk, 3rd Baronet of Penicuik, in commemoration of the Scottish poet Allan Ramsay (1684-1758). He has been called one of Scotland’s most important literary figures and is now mainly known as the author of Scotland’s first folk opera The Gentle Shepherd, set in the countryside around the nearby village of Carlops, that also has a lovely pub named after him.  The Gates and Monument were simply perfect for the prompts Fence, Sky, Sign, Pattern, View, Boundary, and especially Geometric which was the prompt on the day I posted my project  

 I used the L457 Santiago stencil designed by Nathalie Kalbach for Stencilgirl Products in the background and the L456 Buenos Aires one for the Monument. This last paper was done on a gelli plate and then cut to shape.
For the gates itself I used the Chicago art foamie, also designed by Nathalie and in the background I stamped with her Kaffee Klatsch rubber stamp set. Of course I had to include my constant strolling companion, the lovely Miss Flora. She was printed out to size from my computer. I used a quotation from Allan Ramsay himself to finish off the page.

I had a lot of fun making this project and in fact with the entire Stroll through the Hood. It helped me to pay even more attention to my surroundings and I have been keeping that up ever since.

Monday, 7 August 2017

Artmarks continued

varied
It has been awhile since I last added the artmarks pages in my small (3.5 x 5.5) notebook/art journal to this blog. I'm just about managing to keep up with the project on Instagram though, where you can find all the artmarks contributions by looking for the hashtag #artmarks30daychallenge. This project is organized by Rae Missigman who provides us with the prompts. I have added the prompts under each picture. I used a wide variety of techniques and paints, with rubber stamping, stencilling, washi tape, collage etc., etc. All the stencils are by Stencilgirl Products.
mirrored

dripped

many

scratched

scattered

collaged


torn


Monday, 10 April 2017

The Highs and Lows of Life

The next prompt for Joggles Art Journal Adventures will be posted later today so I'm just in time to post my response for the theme last week that told us to: include strong horizontal and vertical elements. I'm again working in my small 6 x 8" journal.
I used the L276 Corrugated Lines stencil by Stencilgirl Products,  and cold colours to make the background with vertical stripes,  and then added strips from a previously gelli plate printed paper to also add vertical lines with.  I used the same stencil but this time with warm colours and tipped on it's side,  to add the horizontal lines and again added gelli plate printed horizontal strips of paper.
The text was printed out using the computer and glued on in the spaces between the strips. I used Glossy Gel Medium for all the glueing.
This spread was simple to put together and I like the effect of all the interweaving lines. They remind me a bit of the skyline of New York. The words are my own.

Monday, 27 February 2017

There are Moments

After our trip to New York last year, the friend that went with me gave me the NY Through the Lens book by Vivienne Gucwa. Not only does this book feature stunning photographs of the city in all seasons but the words are beautifully written too. 

It inspired me to make this spread in the 8 x 8" Dylusions art journal as my latest Stencilgirl Products project. 

When it was finished it didn’t look so much like New York but reminded me more of Venice (I suppose because of the colours!). I didn’t let that worry me. It means it captures moments from trips to both places. I used part of the quotation that is my favourite from the book. 

The entire quotation reads:

"There are moments that remain etched into time: moments that aren't easily forgotten no matter how much time passes in the yawning gap between memory and dreaming".

It's amazing to think that the trip was almost a year ago already. I'm quite ready for a return visit. 
You can find the full step-by-step tutorial for these pages on the Stencilgirl Talk website today, and remember it doesn't have to feature either New York or Venice but could be any city of your choice. Amsterdam would also make a great subject with all it's gabled houses and canals.


LinkWithin

Related Posts with Thumbnails