Some
of you may remember previous sketchbooks I made for The Sketchbook Project, that were
also featured as tutorials on the Stencilgirl® Talk website. Just enter my name in the search
bar there and they’ll pop up. They were all monthly projects in my capacity as Guest Designer for them.
The Sketchbook Project also does other projects apart from
their regular sketchbooks and one of these involves tiny sketchbooks, sized 2.5
x 2.1/4” (about 1/3 of their regular sized ones). These proved irresistible to me so I decided to order one of these tiny beauties and once again also to make it a monthly project for Stencilgirl®. You can find it as a full step by step tutorial on the Stencilgirl®Talk website today. Unusually for me I decided to play with watercolours, both in palette and marker form.
There
are themes set by The Sketchbook
Project to chose from and for mine I selected Around the World. It was both fun and challenging to work on such a tiny scale.
The sketchbook will be posted to the Brooklyn Art Library in due course, where it will find a permanent home and also go on tour. It will be digitized by The Sketchbook Project too. Again to see previous sketchbooks I have done for them (all normal sized!) just search for my name on their site.
Showing posts with label Sketchbook project. Show all posts
Friday, 18 October 2019
Monday, 3 September 2018
Melancholy Sketchbook
Sometimes I am my own worst enemy in that I don't seem to be able to resist new projects and events. And temptation is all around on the internet!
I have been making yearly sketchbooks for The Sketchbook Project for more years than I care to remember but when their latest one popped up in my emails I promptly navigated to the site and that right finger just had to click the Buy button. I decided to combine this sketchbook with my monthly project as Guest Designer for Stencilgirl Products® this September,as I have done before, so if you're interested you can follow a step-by-step tutorial for this journal on Stencilgirl®Talk site, together with a list of all the stencils I used.
The journal The Sketchbook Project sends you is sized 5 x 7" which I have to say is close to my ideal size for working in. I always undo the stapled binding and replace it with a sewn one for added stability.
The Sketchbook Project also provided us with a list of themes and once again I followed my first intuition and choose MELANCHOLY. Just because that was the mood I was in at the time.
Here are all the pages in the order they appear in the journal.
Yes, it will be hard to part with this one, as has been the case with all the other ones but of course I have the pictures on my hard drive and The Sketchbook Project also digitizes the sketchbooks you send them (for an additional cost). Plus the sketchbook gets to go off and travel further afield than The Brooklyn Art Library where it will eventually find a permanent home. Last year's one has already been to Toronto, Canada, Chicago, IL and it will be going to Atlanta, GA later this month.It has also been part of a summer residency at Governor's Island in NYC during the weekends in August.
Monday, 4 June 2018
The Canvas Project
It sounded like fun and I signed up, not once but twice! Then I waited for my canvasses to arrive and discover what words would come my way. Sadly sign-ups are now closed (there were only 2000 word tickets available) but you could of course do the same
by randomly opening a dictionary or encyclopedia with your eyes closed and put your finger down anywhere on the page and use that word as your starting point.
I also used these 4 x 4" canvasses for my June project as guest designer for Stencilgirl® and that means you can find a step by step tutorial on the Stencilgirl®Talk website today where you will discover the two words I was given to use on my canvasses and how I interpreted them.
Boffo and Coxcomb anyone? It's going to be hard to part with this pair but as soon as this blog post is up today I'm going to pack up the two canvasses and send them off. Can't wait to hear where they will end up eventually. And of course which ones I will be receiving in return. I'll make sure to share them with you when they arrive!
Wednesday, 29 November 2017
Touch to Texture
Today I'm treating you to an entire art journal that was done both for The Sketchbook Project as well as for Stencilgirl Products as my monthly project for them. That means you will get a full step-by-step tutorial for it! Link is coming up.
First of all this is my 9th sketchbook for The Sketchbook Project. You can see all the previous ones here. The idea is simple. You sign up, they send you a sketchbook, you fill it in whatever way you like (doesn't have to be sketching but can be anything), and return it to them. If you pay extra, your sketchbook will then be digitized and can be viewed online, while the actual sketchbook is added to the Brooklyn Art Library where it can be borrowed by anyone who visits. The sketchbooks also go on tour throughout the US and sometimes further afield.
For this year's sketchbook I decided to remove the pages from the sketchbook and work on them separately and then bookbind them back into the journal.
I used my gelli plate (8 x 10") and a set of 3 Stencilgirl stencils, all designed by Andrew Borloz: L568 Crazy Quilts Bold & Beautiful, L569 Crazy Quilts Calm & Frenzy, and L570 Crazy Quilts Crosses & Rounds. Do I need to tell you how much I love these stencils? I think not! Anything that combines my love of quilting and stencils is simply the best in my book.
I choose the theme Texture from the list provided by The Sketchbook Project this year (you can also choose your own, if you prefer) and that meant I wanted to add not just visual texture to the pages but also actual touchy feelly texture in the shape of stitching, specially as this resonated with the crazy quilt theme of the stencils. You can see it on the close-ups. I must admit though that it doesn't compare to holding the sketchbook in your hands and stroking it. I expect I will do this quite a bit before I mail it off in the coming days to it's final destination in Brooklyn, NY.
First of all this is my 9th sketchbook for The Sketchbook Project. You can see all the previous ones here. The idea is simple. You sign up, they send you a sketchbook, you fill it in whatever way you like (doesn't have to be sketching but can be anything), and return it to them. If you pay extra, your sketchbook will then be digitized and can be viewed online, while the actual sketchbook is added to the Brooklyn Art Library where it can be borrowed by anyone who visits. The sketchbooks also go on tour throughout the US and sometimes further afield.
All the instructions with step-by-step pictures can be found on Stencilgirl Talk today.
I used my gelli plate (8 x 10") and a set of 3 Stencilgirl stencils, all designed by Andrew Borloz: L568 Crazy Quilts Bold & Beautiful, L569 Crazy Quilts Calm & Frenzy, and L570 Crazy Quilts Crosses & Rounds. Do I need to tell you how much I love these stencils? I think not! Anything that combines my love of quilting and stencils is simply the best in my book.
I choose the theme Texture from the list provided by The Sketchbook Project this year (you can also choose your own, if you prefer) and that meant I wanted to add not just visual texture to the pages but also actual touchy feelly texture in the shape of stitching, specially as this resonated with the crazy quilt theme of the stencils. You can see it on the close-ups. I must admit though that it doesn't compare to holding the sketchbook in your hands and stroking it. I expect I will do this quite a bit before I mail it off in the coming days to it's final destination in Brooklyn, NY.
You can see a flip through of this sketchbook here!
Yes, I have finally uploaded my own video to my YouTube channel after much deliberation and try-outs. Hope you'll pay a visit.
I enjoyed making this sketchbook hugely. It reminded me how much I love to hand stitch and encouraged me to do lots (and lots, and then some more) on the quilt I'm working on at the moment. It's so addictive and very zen. If you find mindfulness hard going, give hand stitching a go!
I'm also very happy that Stencilgirl Products has given me the opportunity to share my process as well as the end result with you, in my capacity as Guest Designer. And I'm ecstatic to be able to announce I will be back with them once a month in 2018!
Friday, 26 August 2016
More Pattern Play Pages
You may remember I was featured as Guest Designer on Stencilgirl Talk last Wednesday and showed my finished piece for the Sketchbook Project made using a gelli plate and a wide variety of Stencilgirl stencils. Here is the post and it contains a link to the full tutorial which can be found here.
Today I'm packing up the sketchbook in order to return it to the Brooklyn Art Library and I realized that there are a few pages I didn't share, either here or on the Stencilgirl Talk site, in order that the posts didn't become too overwhelmingly large. So here are those missing pages.
Wednesday, 17 August 2016
Pattern Play
My latest project for Stencilgirl Products is also my latest contribution for the Sketchbook Project. For those of you unaware of this project the idea is that you buy one of their sketchbooks (sized 5 x 7"), select a theme and fill it however you want and return it to them. They will also digitalize your sketchbook if you pay for that option. You can see all my previous sketchbooks for the project here. The sketchbook itself becomes part of the Brooklyn Art Library and goes on tour to various venues. Sadly the Library was in the process of moving while I was in New York in April so it wasn't possible to pay a visit but I hope to get there one day!
I choose Design Patterns as my theme and the sketchbook is called Pattern Play.
There are full step-by-step instruction on how I made all the pages and put the sketchbook together again after taking it apart on the Stencilgirl Talk site today. This was necessary as all the pages were produced using the gelli plate and a selection of Stencilgirl stencils. For the full list go to the site but I recommend that you use those Stencilgirl stencils you love most if you want to undertake a similar project. The pages would look totally different.
The paper in the sketchbook provided is quite thin which can be a problem for some techniques but it proved to be ideal for gelli plate printing. Once both sides of all the pages were done I had a most enjoyable time putting it all back together and deciding which pages went well together.
I added text and quotation to all the spreads as well as some of my beloved postage stamps.
This was such a fun project to work on and I'm quite pleased with the results. The sketchbook will now be wrapped up and will be winging it's way back to Brooklyn Art Library very soon. I only wish I do hand deliver it in person!
I choose Design Patterns as my theme and the sketchbook is called Pattern Play.
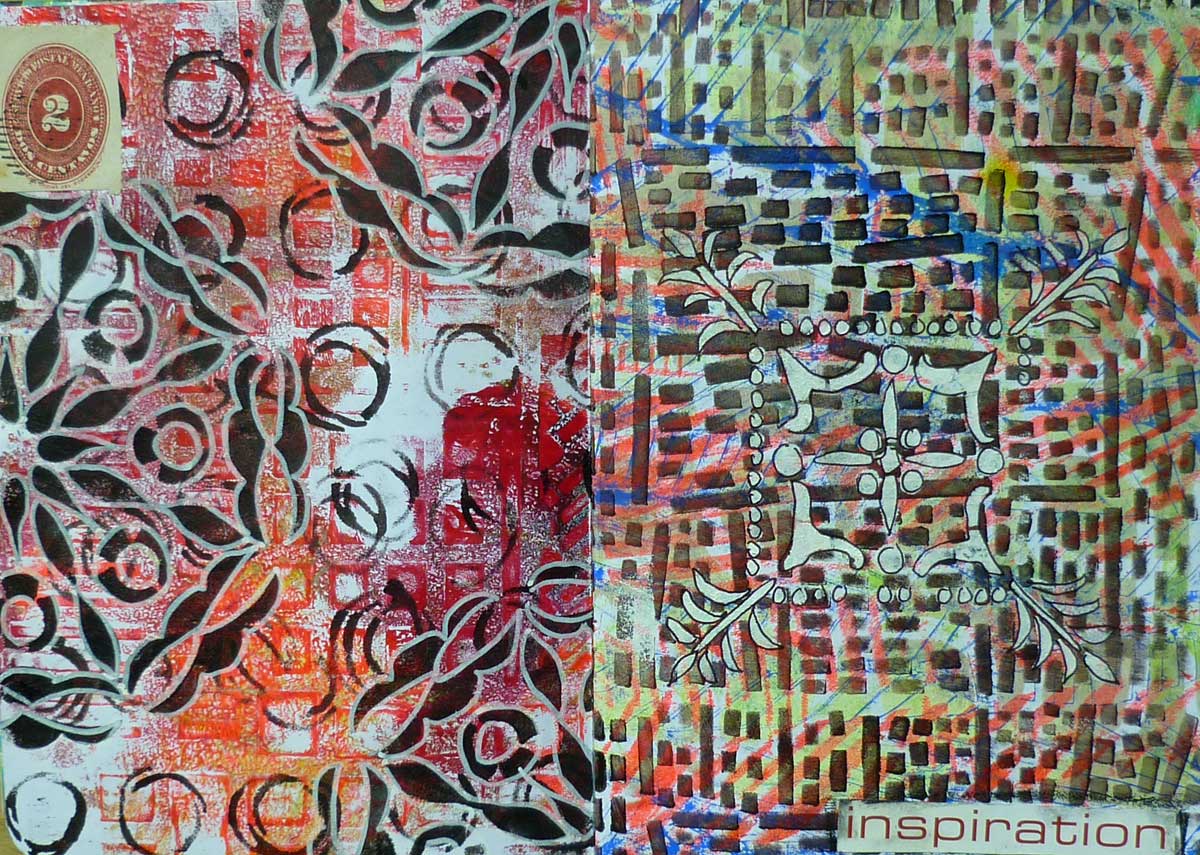
![]() |
| Page 1 |
The paper in the sketchbook provided is quite thin which can be a problem for some techniques but it proved to be ideal for gelli plate printing. Once both sides of all the pages were done I had a most enjoyable time putting it all back together and deciding which pages went well together.
I added text and quotation to all the spreads as well as some of my beloved postage stamps.
This was such a fun project to work on and I'm quite pleased with the results. The sketchbook will now be wrapped up and will be winging it's way back to Brooklyn Art Library very soon. I only wish I do hand deliver it in person!
Friday, 22 August 2014
Passioneyes 3
I thought about waiting and posting late tonight after the preview of the exhibition (6 - 9 pm! see yesterday's post) but then decided this would be adding more stress to the occasion and it is in any case always hard to take pictures at such events so I will be concentrating on taking pictures there tomorrow and blogging them then, and perhaps add any pictures I (or John) might take tonight to that post .
Instead I'm adding the last few spreads in my Passioneyes Journal today. This is made for the Sketchbook Project and once I've done this post the sketchbook will be winging it's way to the Brooklyn Art Library where it will become part of the collection and then travel across the US next summer. It will also be digitalized by the Project and be available for online viewing together with all the previous sketchbooks I did for them. You can see the previous pages in this sketchbook in my earlier posts here and here.
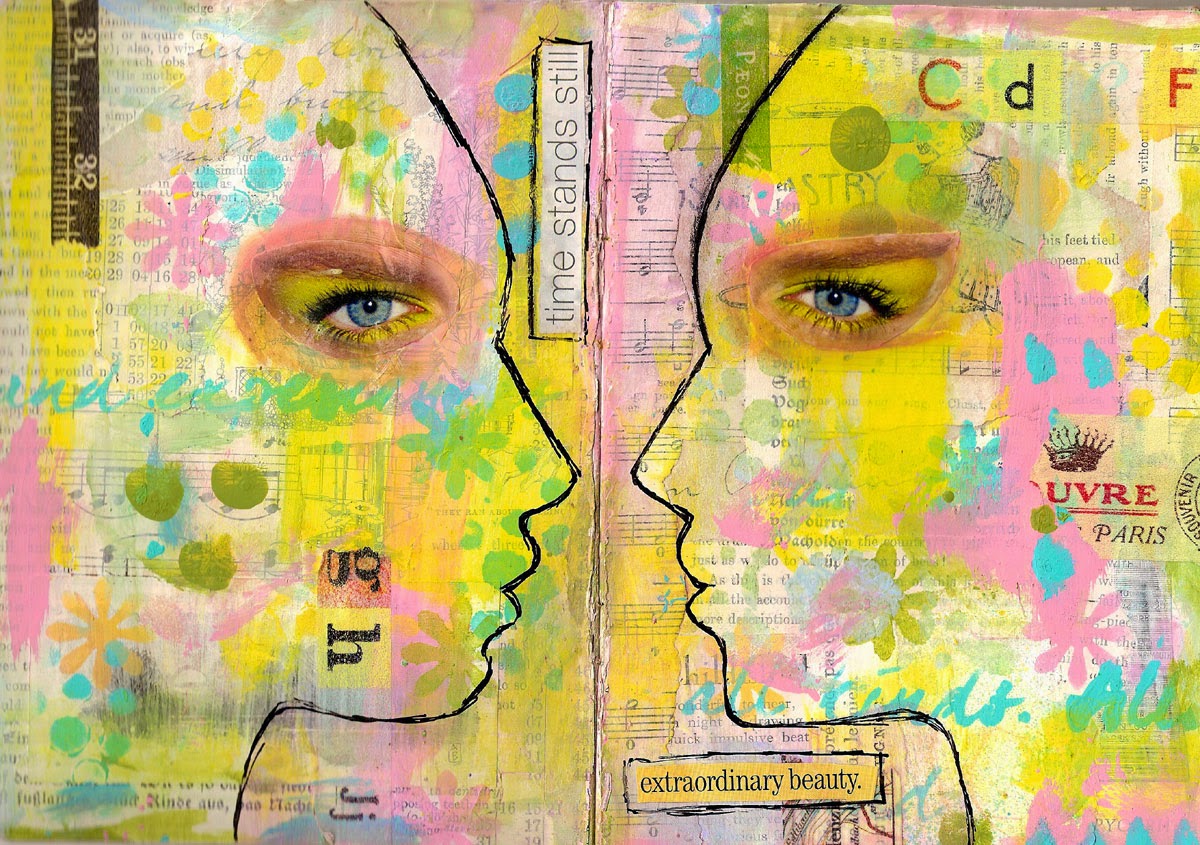
I started by gluing several of the pages in this Moleskine like sketchbook together to make a sturdier surface and then collaged vintage images and text onto the pages in keeping with my chosen theme of History Book. I added acrylic paints and then used faces from magazines as mask and surrounded them with Silk Acrylic Glaze, purple in this case. I added the found text to the spreads.Washi tape was also put onto the pages as you can see clearly above (the Paris text bit). This sketchbook is all about the eyes though and they too come from magazines and were collaged onto the faces.
Instead I'm adding the last few spreads in my Passioneyes Journal today. This is made for the Sketchbook Project and once I've done this post the sketchbook will be winging it's way to the Brooklyn Art Library where it will become part of the collection and then travel across the US next summer. It will also be digitalized by the Project and be available for online viewing together with all the previous sketchbooks I did for them. You can see the previous pages in this sketchbook in my earlier posts here and here.
I started by gluing several of the pages in this Moleskine like sketchbook together to make a sturdier surface and then collaged vintage images and text onto the pages in keeping with my chosen theme of History Book. I added acrylic paints and then used faces from magazines as mask and surrounded them with Silk Acrylic Glaze, purple in this case. I added the found text to the spreads.Washi tape was also put onto the pages as you can see clearly above (the Paris text bit). This sketchbook is all about the eyes though and they too come from magazines and were collaged onto the faces.
I love how the vintage imagery peeks through!
And this is the back cover where you can see the barcode that is unique to each sketchbook and that is scanned every time the book is borrowed by someone. I get send an e-mail when that happens too and it's always so lovely to see them coming in and know that someone I don't know in a place far away has been looking through my sketchbook. It give me a thrill every time!
Saturday, 2 August 2014
Passioneyes 2
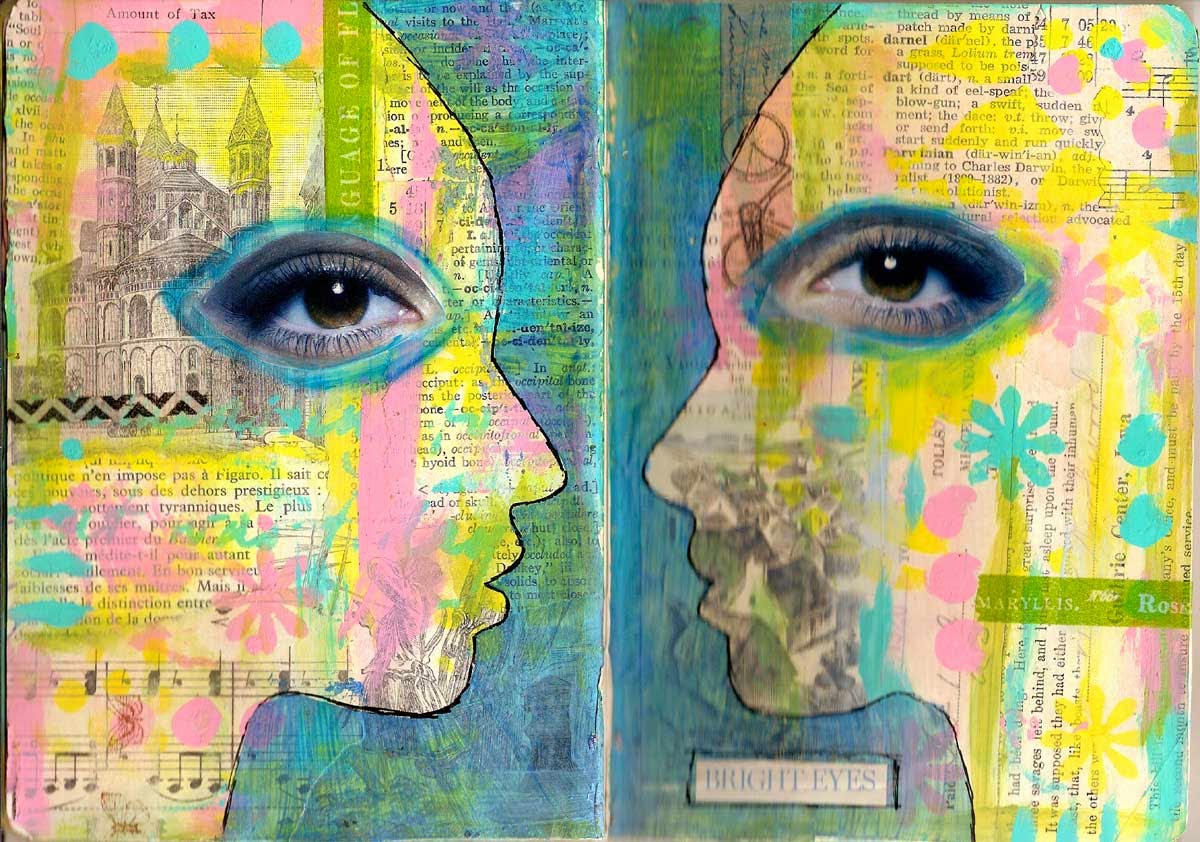
It was a month ago to the day that I uploaded the first part of my Passioneyes sketchbook and I promised at that time to come back with more soon. Well, it wasn't as soon as I had planned but here finally are three more pages, starting with the above "Where Beauty Begins". This sketchbook is my 6th one for the Sketchbook Project. The idea is that you register and pay, and the Project sends you a 5 x 7" sketchbook. You can choose a theme when registering which for me was History Book. You then fill the sketchbook with whatever you like vaguely based on your theme. They aren't strict about this which is just as well as I left my theme far behind when I started work. So not just sketching is allowed but all kinds of other media. When you've filled your sketchbook you send it back to the Brooklyn Art Library where the project is based, and it becomes part of the library. If you have chosen the option of digitalizing your sketchbook (which costs extra) they do that on arrival and your sketchbook or books become part of the online presence of the Sketchbook Project. You can find all my contributions here.
The sketchbooks also go on tour and can be borrowed during that time too from the various venues they go to. This sketchbook will be on tour during the summer of 2015.
Check out my previous post for a detailed write-up of the techniques I used but I started by sticking to the history theme and making collages on all my spreads with vintage papers from a wide variety of vintage books. You can still see them quite well on the above page. I added acrylic paints to the pages after the collaging. I then used faces from Vogue magazine as a mask and added Silks Acrylic Glazes to the rest of the pages.
The final additions were the eyes and the titles of the spreads. These from the top are spreads 4, 5 and 6. One more spread will follow as well as the back of the sketchbook. Better not say when as I got it so wrong last time, but one of these days. I had to glue multiple pages of the sketchbook together to make a sturdy enough background for all that glueing and painting so I ended up with a total of 7 spreads plus the front and back cover.
![]() |
| Bright Eyes |
Check out my previous post for a detailed write-up of the techniques I used but I started by sticking to the history theme and making collages on all my spreads with vintage papers from a wide variety of vintage books. You can still see them quite well on the above page. I added acrylic paints to the pages after the collaging. I then used faces from Vogue magazine as a mask and added Silks Acrylic Glazes to the rest of the pages.
The final additions were the eyes and the titles of the spreads. These from the top are spreads 4, 5 and 6. One more spread will follow as well as the back of the sketchbook. Better not say when as I got it so wrong last time, but one of these days. I had to glue multiple pages of the sketchbook together to make a sturdy enough background for all that glueing and painting so I ended up with a total of 7 spreads plus the front and back cover.
Wednesday, 2 July 2014
Passioneyes Sketchbook
I have been participating in the Sketchbook Project for quite some time now and this is my 6th sketchbook for it. You can see all the previous ones I've done online here. The books go to the Brooklyn Art Library and from there they travel all over the United States and sometimes further afield. They can be borrowed just like books from any library and after their tours they return and become part of the permanent collection of the library. This one will be touring in 2015. When I signed up (and there is still plenty of time to do so yourself if you're so inclined. Just go here) I had to choose a theme and I went for History Book, just because history is something I'm always fascinated by. However there is no need to stick too closely to your theme and as you can tell from this one I veered off subject rather far.
This is the front of the sketchbook and it was made last. By that time I already knew what the rest of the sketchbook looked liked and the front reflects that content. I found the title of the book while leafing through a Sunday supplement of the paper and once again it so exactly resonated with the sketchbook that it was quite uncanny.
When I started work in the sketchbook I still kept my theme firmly in mind and I began by collaging vintage papers over all the spreads. The pages of this 5 x 7 Moleskine sketchbook that the project provides you with, are quite flimsy and don't stand up well to lots of mixed media work as I know from previous ones so I glued quite a few of the pages together to make a sturdier background, ending up with 7 spreads. After that I could add those vintage papers and then cover them in thinned down gesso. That gave a good background for the next step which involved painting with acrylic paints followed by some stencilling.
I seem to have developed an obsession with using eyes and these pages follow in the footsteps of previous work where I have used faces as masks. I found my faces in magazines (Vogue is specially good!) and painted around them with acrylic glaze which means you can still see a bit of the background, but it made the faces stand out beautifully. Then I looked for eyes (again Vogue has some great ones) and added them. The last step was to use markers and watercolour oil pastels to integrate the eyes into the backgrounds. Then the search for the texts began. These came from a wide variety of sources and they together with some strips of washi tape were the finishing touch to every page. In some of the texts I refer back somewhat to that history theme.
All the pages were done in the same way and you can see above that I used the same face as a mask on each spread with one of them mirrow imaged.
Even I found some of the finished pages a bit startling and for some reason the above one was the most unnerving, maybe because there are so many eyes as I've used the whole face rather than the silhouette.
After this front and 3 spreads you will be seeing the rest of the sketchbook in future posts. Only the image at the top is a photograph, all the rest are scans. There is quite a colour difference between the two, but I needed a picture to use as my blip for today!
This is the front of the sketchbook and it was made last. By that time I already knew what the rest of the sketchbook looked liked and the front reflects that content. I found the title of the book while leafing through a Sunday supplement of the paper and once again it so exactly resonated with the sketchbook that it was quite uncanny.
When I started work in the sketchbook I still kept my theme firmly in mind and I began by collaging vintage papers over all the spreads. The pages of this 5 x 7 Moleskine sketchbook that the project provides you with, are quite flimsy and don't stand up well to lots of mixed media work as I know from previous ones so I glued quite a few of the pages together to make a sturdier background, ending up with 7 spreads. After that I could add those vintage papers and then cover them in thinned down gesso. That gave a good background for the next step which involved painting with acrylic paints followed by some stencilling.
I seem to have developed an obsession with using eyes and these pages follow in the footsteps of previous work where I have used faces as masks. I found my faces in magazines (Vogue is specially good!) and painted around them with acrylic glaze which means you can still see a bit of the background, but it made the faces stand out beautifully. Then I looked for eyes (again Vogue has some great ones) and added them. The last step was to use markers and watercolour oil pastels to integrate the eyes into the backgrounds. Then the search for the texts began. These came from a wide variety of sources and they together with some strips of washi tape were the finishing touch to every page. In some of the texts I refer back somewhat to that history theme.
All the pages were done in the same way and you can see above that I used the same face as a mask on each spread with one of them mirrow imaged.
Even I found some of the finished pages a bit startling and for some reason the above one was the most unnerving, maybe because there are so many eyes as I've used the whole face rather than the silhouette.
After this front and 3 spreads you will be seeing the rest of the sketchbook in future posts. Only the image at the top is a photograph, all the rest are scans. There is quite a colour difference between the two, but I needed a picture to use as my blip for today!
Wednesday, 27 November 2013
Borderline Sketchbook
It remains a mystery to me why a project that was almost completely done in the summer took so long to finish. It was lingering on my desk and my to-do list for months now and the only thing I needed to do was add matte medium to the covers to preserve them. Finally I did the deed yesterday and the sketchbook is now ready to be mailed off to the Brooklyn Art Library and become part of the Sketchbook Project. I have been participating in these yearly sketchbook projects for quite some years now and this is my 6th sketchbook. You can see the previous ones here.I then added different laces in between the pages. The laces were stiffened up first using a thinned down PVA glue to make them stand up and they were space dyed before stiffening. I sewed them in between two pages. Above the first very thin (about 1/2") page. Following are all the pages in the order that they are in the sketchbook itself.
As you can see I stamped sayings about borders and lines on the edge of the pages.
I used different lace on each page.
The above is probably my favourite of this sketchbook. By some flukish coincidence I found an article about Paul Klee in the Spanish newspager! Such great synchronicity once again.
This is the front cover with collage, glued on lace and the title of the sketchbook stamped on.
On the left hand side is this Sketchbook's barcode in the Brooklyn Art Library that will be scanned every time someone borrows it. This can be done in the library itself but the sketchbook will also go on tour in 2014. The Sketchbook Project has now become so popular that not all the sketchbooks can go on one large tour as happened this year but instead there will be 4 different tours in various areas of the United States. As I won't be there anyway I choose the 2014 South East Tour for no other reason than that I know at least some people (such as Lenna!) who live there. Every time my sketchbook get borrowed I receive an e-mail. The sketchbook that was on tour this summer was borrowed many times in many different places and it was such a treat to see that people I didn't know and probably will never know were enjoying looking through my book.
This book will be going postal in the next few days and no doubt I will sign up again as soon as it is possible for the 2015 tour!
Subscribe to:
Posts (Atom)